
Envelope liners are a great touch to add to any snail-mail project, whether it's invitations, holiday cards, or just a thinking-of-you-and-wanted-to-do-more-than-message-you-on-FB note, they are a simple way to really personalize your project. For my sister's baby shower, I added striped and polka-dot liners to the invitation envelopes and loved the impact. Here's how to do it:
Materials:
Xacto knife
cutting mat
straight edge
pencil
double stick tape
scissors or corner-rounder
text weight (24 lb) patterned paper
envelopes
For a completely individual look, create your own pattern and print it on text weight paper.
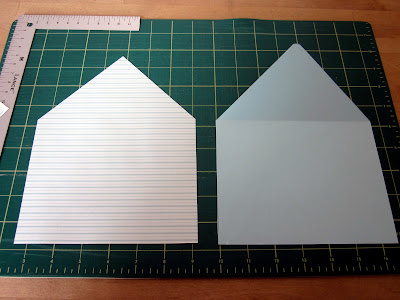
First, I created a template for the liner, which will be positioned just inside the glue area and about a quarter inch within each side of the envelope. The template is made from an envelope that is the same size as the ones you will be lining.
Grab an envelope. If you need a guide, use a straight edge to draw a line just below the glue area, and then from the end of the glue area, about .25" inside the vertical side of the envelope, straight down to the bottom of the envelope, making sure it is parallel to the vertical side. Then use the Xacto to cut on this line and the horizontal crease of the bottom of the envelope, and you have your template. I eyeballed it and went straight to cutting.


As you can see here, my envelope has a rounded point on the flap, so I used a corner rounder to make my template match.
Next, use your template to trim your patterned paper to the proper shape. Place the template on top of the patterned paper, making sure it is oriented in the way you would like it to sit inside of your envelope, and trim around it. I stacked several sheets together to save time. It may also help to put something weighted on the center of the template to prevent it from shifting as you cut around it.


Again, since my envelope had a rounded point on the flap, I used a .5" corner rounder to match it. If you don't have one of these handy contraptions, pencil in a guide and use a scissor.

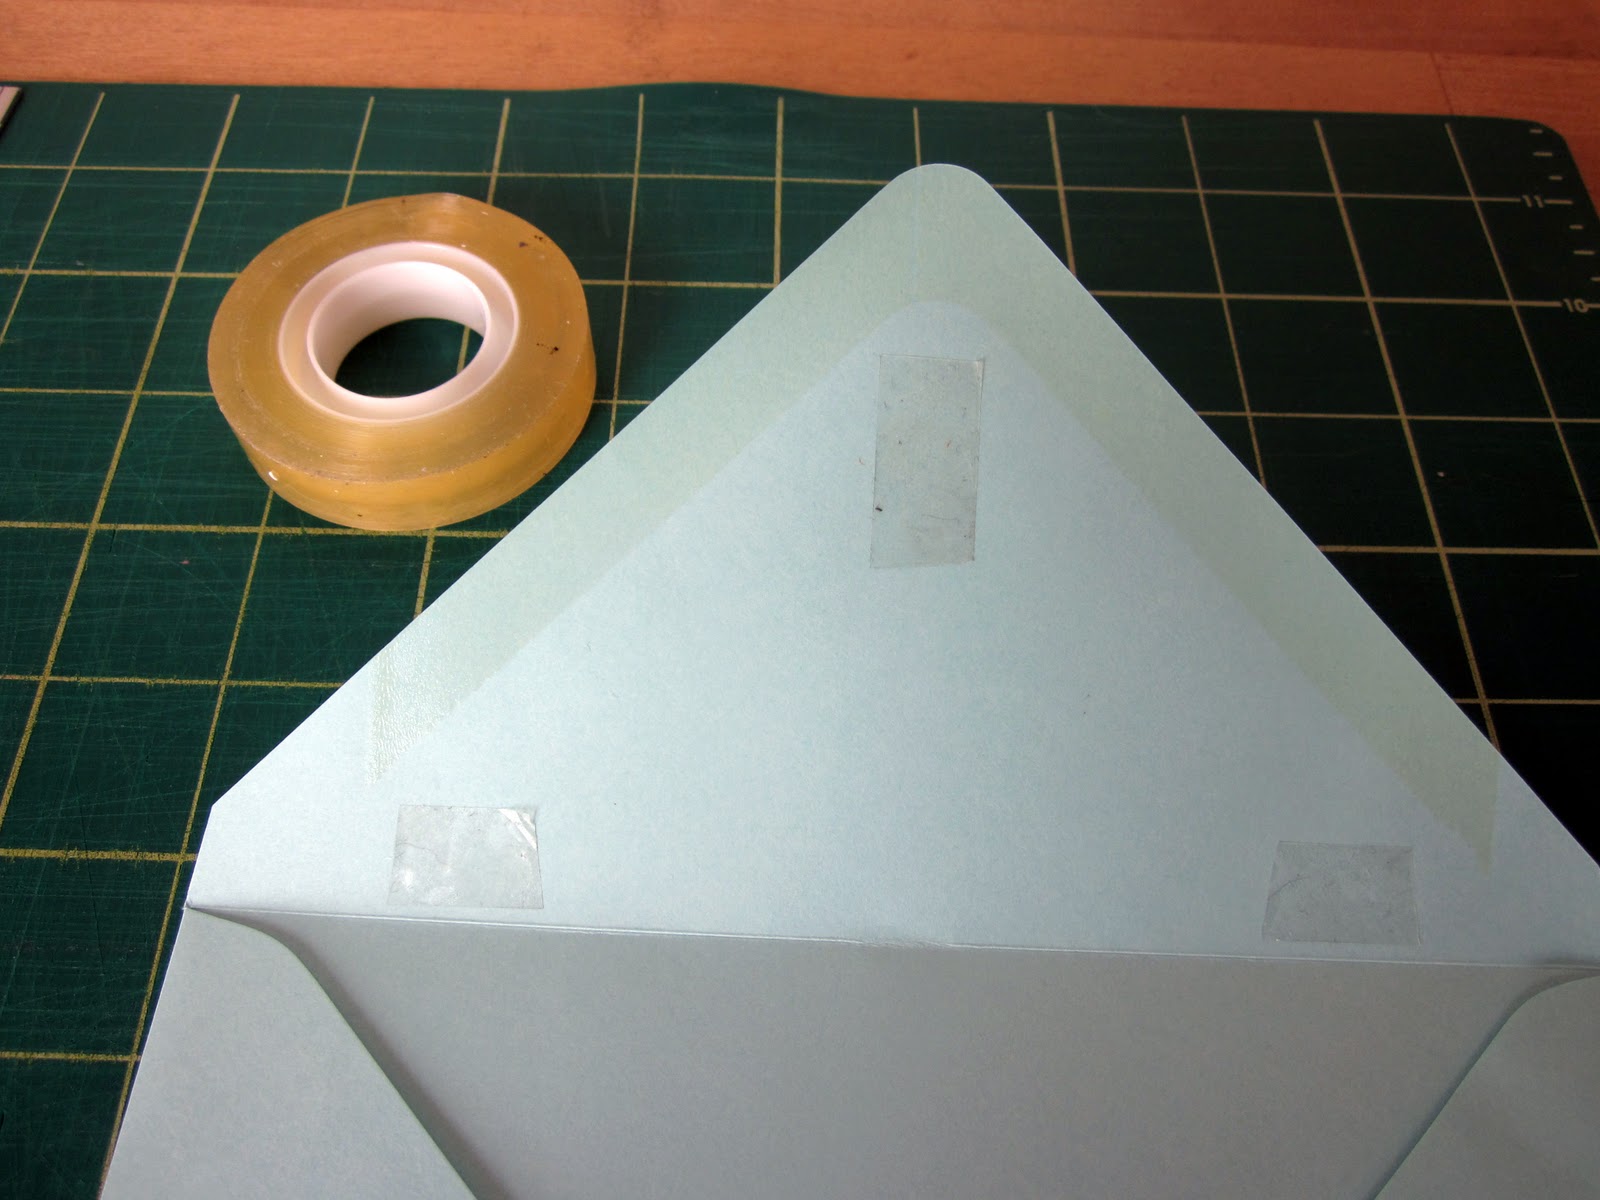
Now to adhere the liner to the envelope. Place three small pieces of double sided tape (preferably not yucked up pieces like in this photo) at the point and both sides just inside the area the liner will cover.

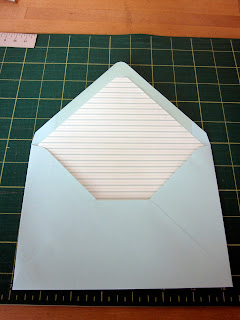
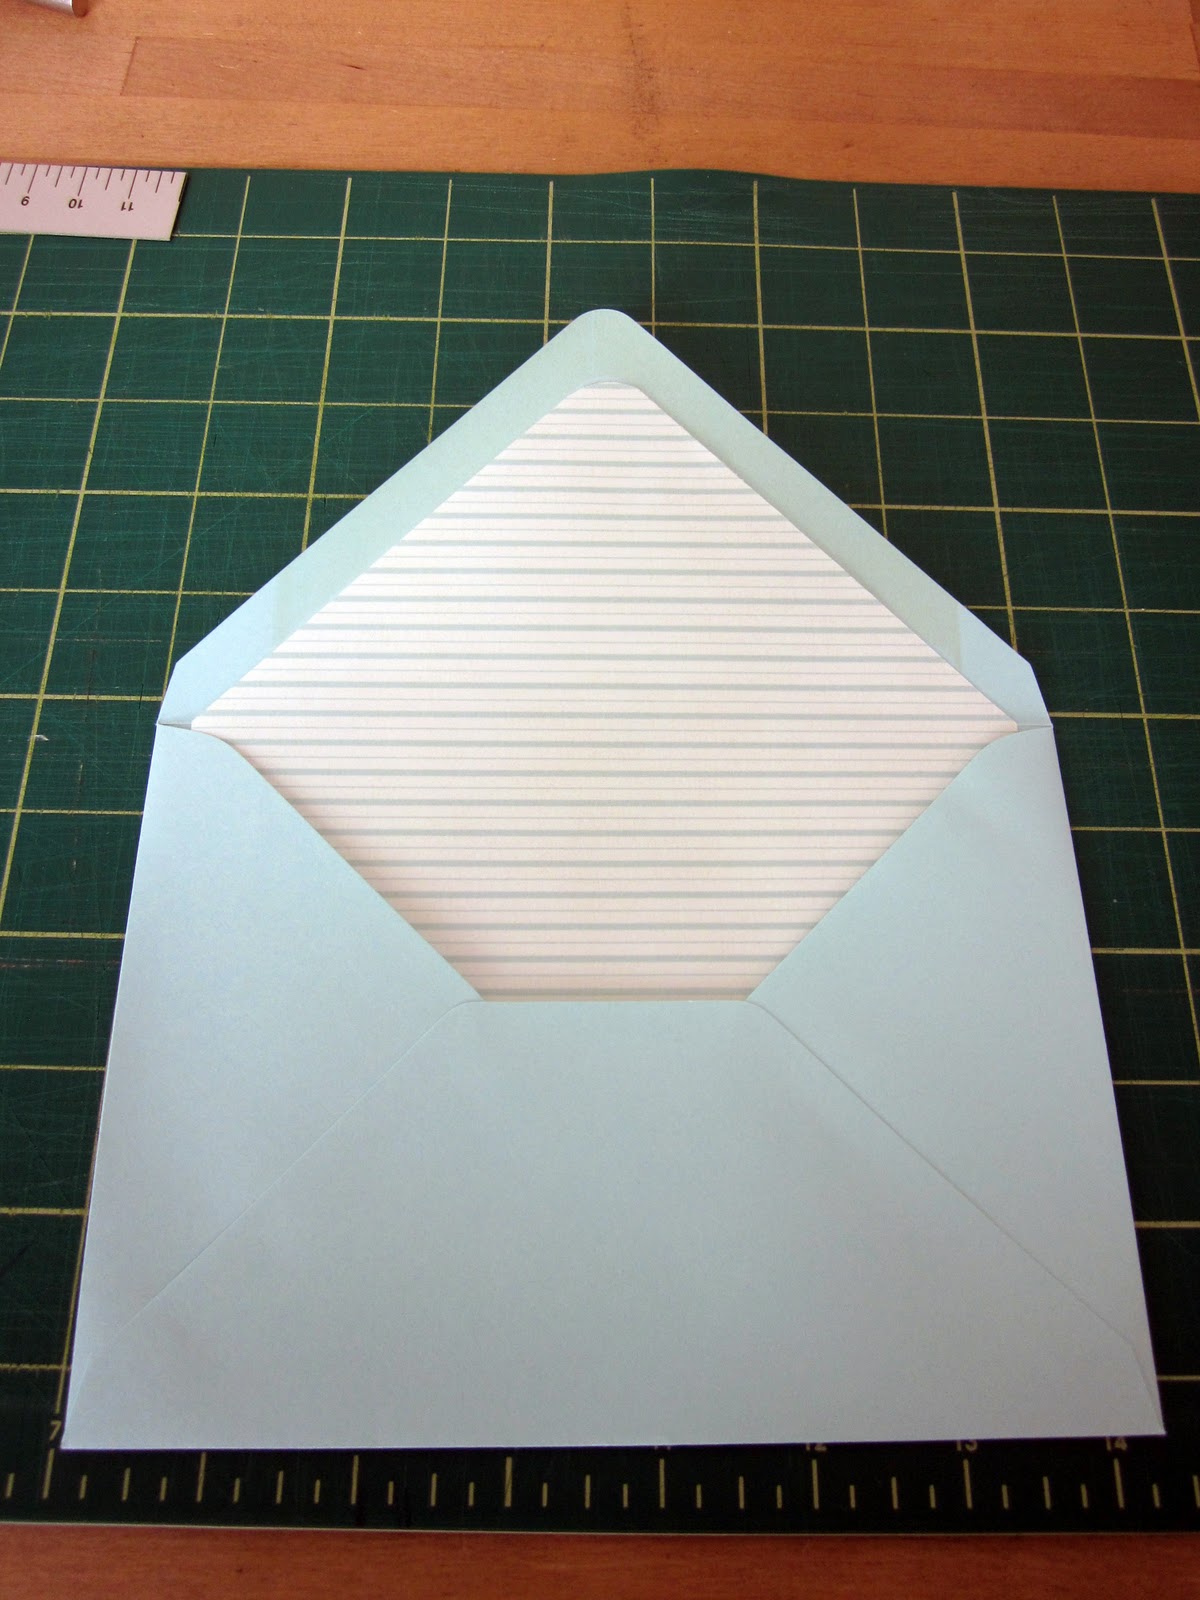
Then slip the liner into the envelope, position it properly, and press it to the tape.

Hold the liner in place and gently fold the flap so that the liner creases along with it.

Lastly, stuff your envelope and admire your handiwork!
No one may ever comment on your lovely liners, but I feel that it's these details that add to the overall presentation of handmade projects, making them look finished and something people will admire.
Materials:
Xacto knife
cutting mat
straight edge
pencil
double stick tape
scissors or corner-rounder
text weight (24 lb) patterned paper
envelopes
For a completely individual look, create your own pattern and print it on text weight paper.
First, I created a template for the liner, which will be positioned just inside the glue area and about a quarter inch within each side of the envelope. The template is made from an envelope that is the same size as the ones you will be lining.
Grab an envelope. If you need a guide, use a straight edge to draw a line just below the glue area, and then from the end of the glue area, about .25" inside the vertical side of the envelope, straight down to the bottom of the envelope, making sure it is parallel to the vertical side. Then use the Xacto to cut on this line and the horizontal crease of the bottom of the envelope, and you have your template. I eyeballed it and went straight to cutting.


As you can see here, my envelope has a rounded point on the flap, so I used a corner rounder to make my template match.
Next, use your template to trim your patterned paper to the proper shape. Place the template on top of the patterned paper, making sure it is oriented in the way you would like it to sit inside of your envelope, and trim around it. I stacked several sheets together to save time. It may also help to put something weighted on the center of the template to prevent it from shifting as you cut around it.


Again, since my envelope had a rounded point on the flap, I used a .5" corner rounder to match it. If you don't have one of these handy contraptions, pencil in a guide and use a scissor.

Now to adhere the liner to the envelope. Place three small pieces of double sided tape (preferably not yucked up pieces like in this photo) at the point and both sides just inside the area the liner will cover.
Then slip the liner into the envelope, position it properly, and press it to the tape.

Hold the liner in place and gently fold the flap so that the liner creases along with it.

Lastly, stuff your envelope and admire your handiwork!
No one may ever comment on your lovely liners, but I feel that it's these details that add to the overall presentation of handmade projects, making them look finished and something people will admire.
No comments:
Post a Comment